


Hey there! I just finished working on a React e-commerceproject, and I'm excited to tell you all about it! So basically, the shoe pictures get from the Unsplash website, which is really cool.
In my project, I used Tailwind CSS to style various elements, including the product grid on the home page and the product details page. This made it easy to ensure that my website looked great and was easy to use on any device, whether users were browsing on a desktop, tablet, or smartphone.

- The purpose of this project was to provide a simple and easy-to-use interface for users to experiment with and test their front-end development skills.
React Router DOM
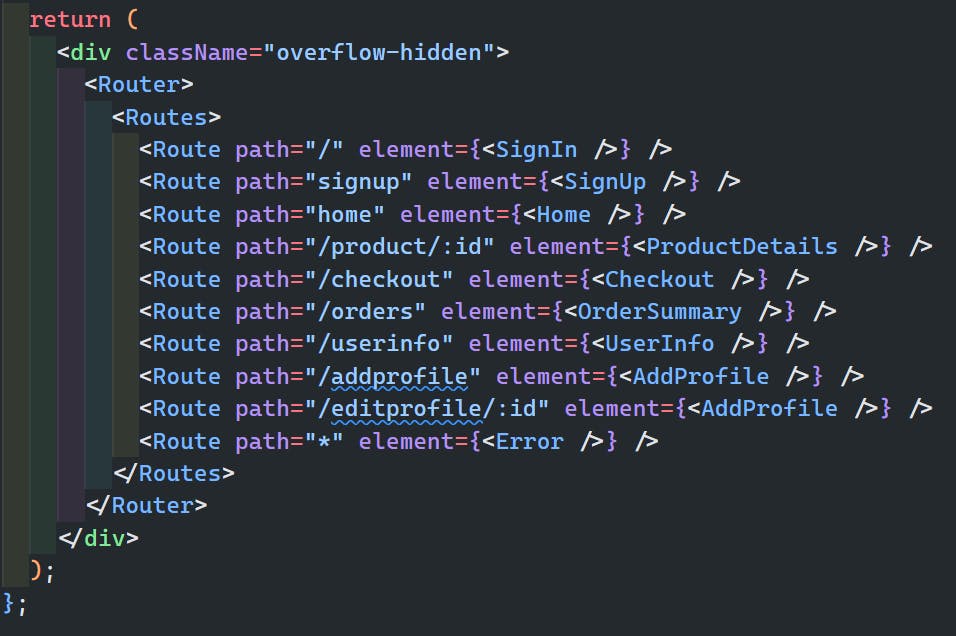
I used react-router-dom to create eight pages: signin, signup, home, product details, checkout ,order history,user info/ add profile, error.
In the
signin page, I added a 'Sign Up' button that redirects the user to the signup page when clicked , if user want to create an account.On the
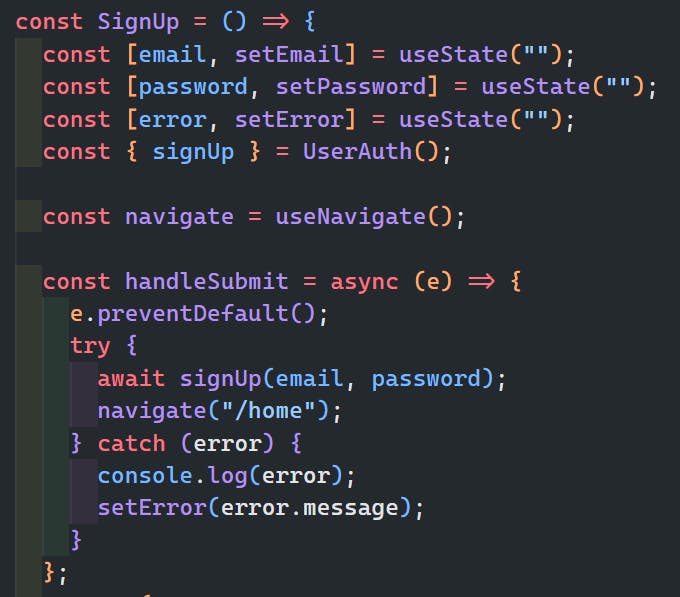
signup page, I created a signup form that allowed the user to enter their email and password. I also included validation for the form to ensure that the user enters valid information. After the form is successfully submitted, I usedFirebase Authenticationto create a new user account and then redirected the user to the home page.On the
home page, where users can see all the available products.On the
product details page, where users can learn more about a specific product when they click on it.On our
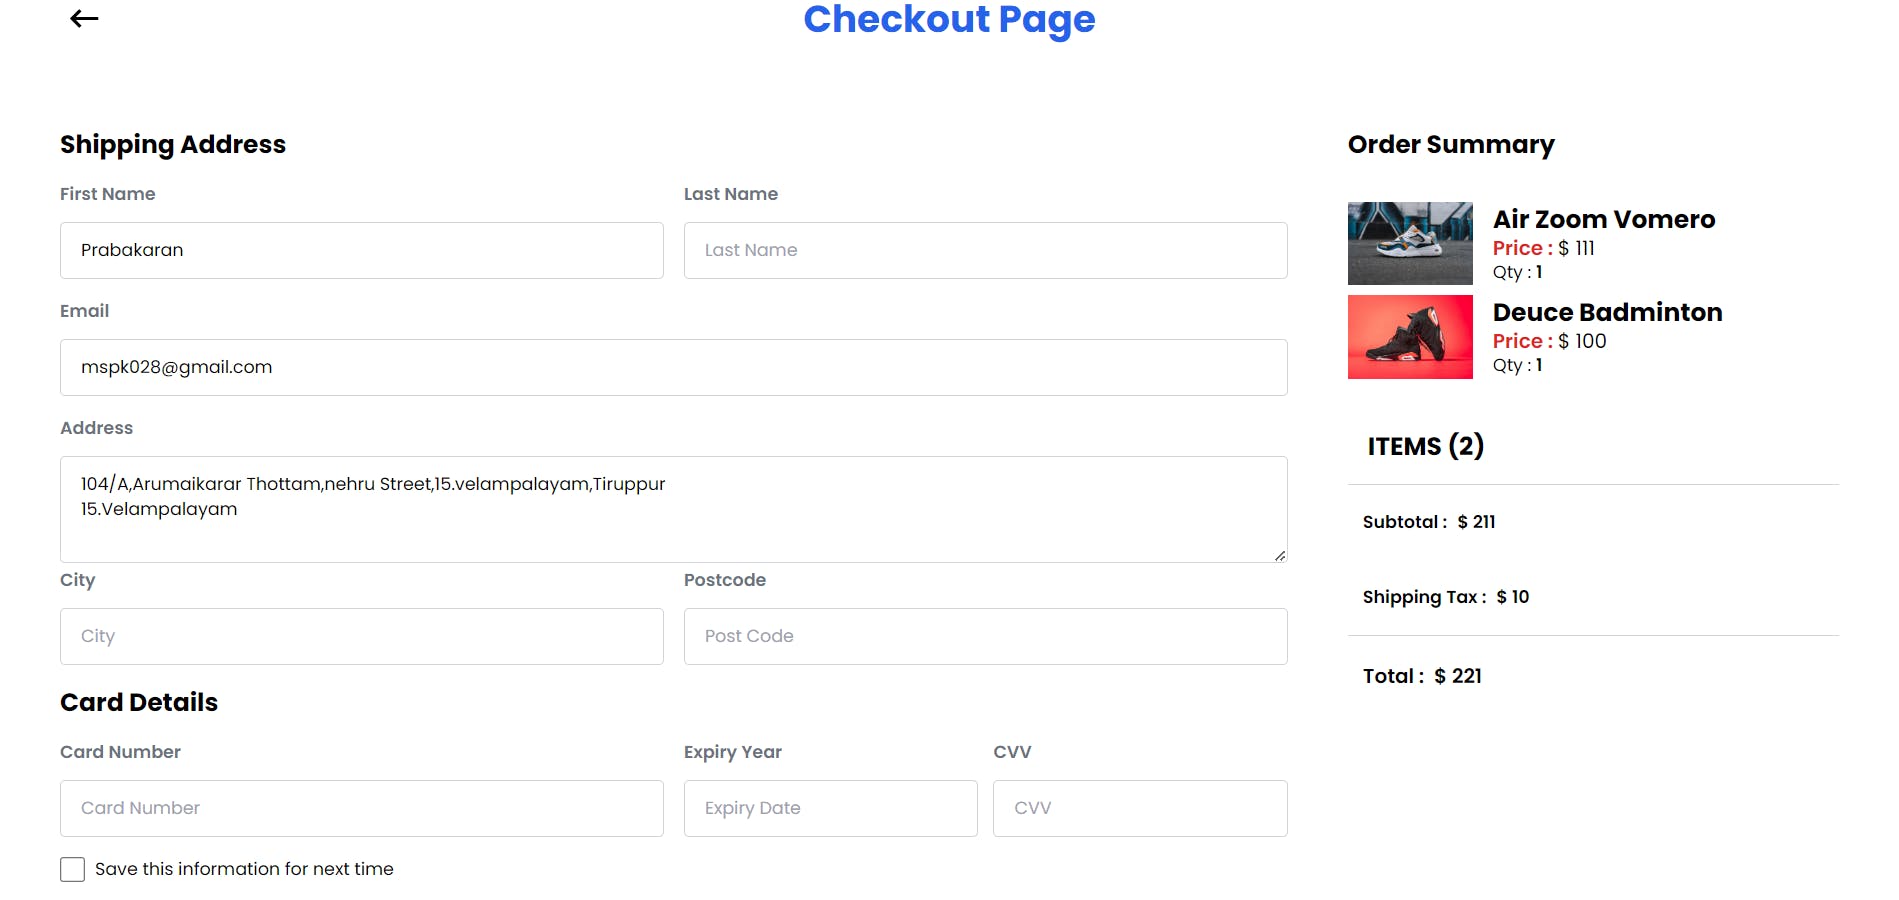
checkout page, The cart items are displayed along with the product image, name, quantity, and price.In the
order history page, the user can see the products that were ordered.Our
user info pagedisplays the customer's profile information. If the customer has not created a profile, they can do so on theAdd Profilepage.Invalid or collapsed URL paths will display an
error pagein our React eCommerce project.
The use of React Router DOM to navigate to this page makes it super easy to access more information about a product.
1.SignIn & SignOut Page
I added Firebase Authentication to my project so that only authenticated users can access the page. First, I created a Firebase project and enabled Firebase Authentication in the Firebase Console. Then, I added the Firebase SDK to my project and implemented the authentication flow in my app. This involved creating sign-up and login pages, allowing users to create accounts or log in with their existing credentials.

When I implemented the signin and signup forms, I used the same validation process for both forms to ensure that users enter valid information. This included checking that the email address is in the correct format and that it is not already registered with Firebase Authentication. By implementing the same validation for both forms, it helped me to streamline the validation process and ensure that users receive a consistent experience, whether they are signing up for a new account or signing in to an existing one.
Now, only authenticated users can access the page, and I have greater control over who can access my app's features and data.
2.Home Page
The home page is where you can see all the products, and it's pretty neat and organized. The grid format makes it really easy to browse through the products and find what you're looking for.

3.Product Details Page
If you click on a particular product, you'll be taken to the product details page, where you can see its description.

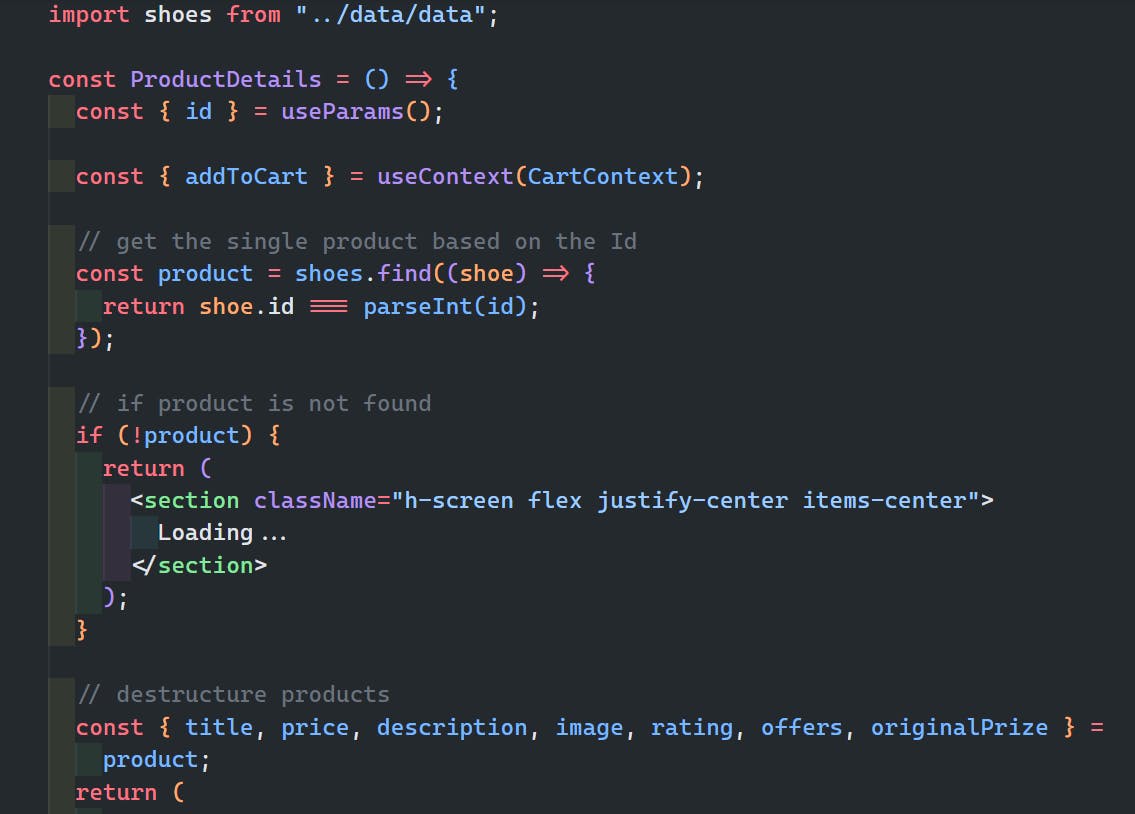
So basically, when a user clicks on a particular product on the home page, they are automatically taken to the product details page. On this page, users can see the product's name, image, price, and other important information. This makes it easy for users to learn more about the products they're interested in, and it creates a more engaging user experience.
By using React Router DOM to create these two pages, I've made my e-commerce website more organized and user-friendly.
4. Checkout Page
On our
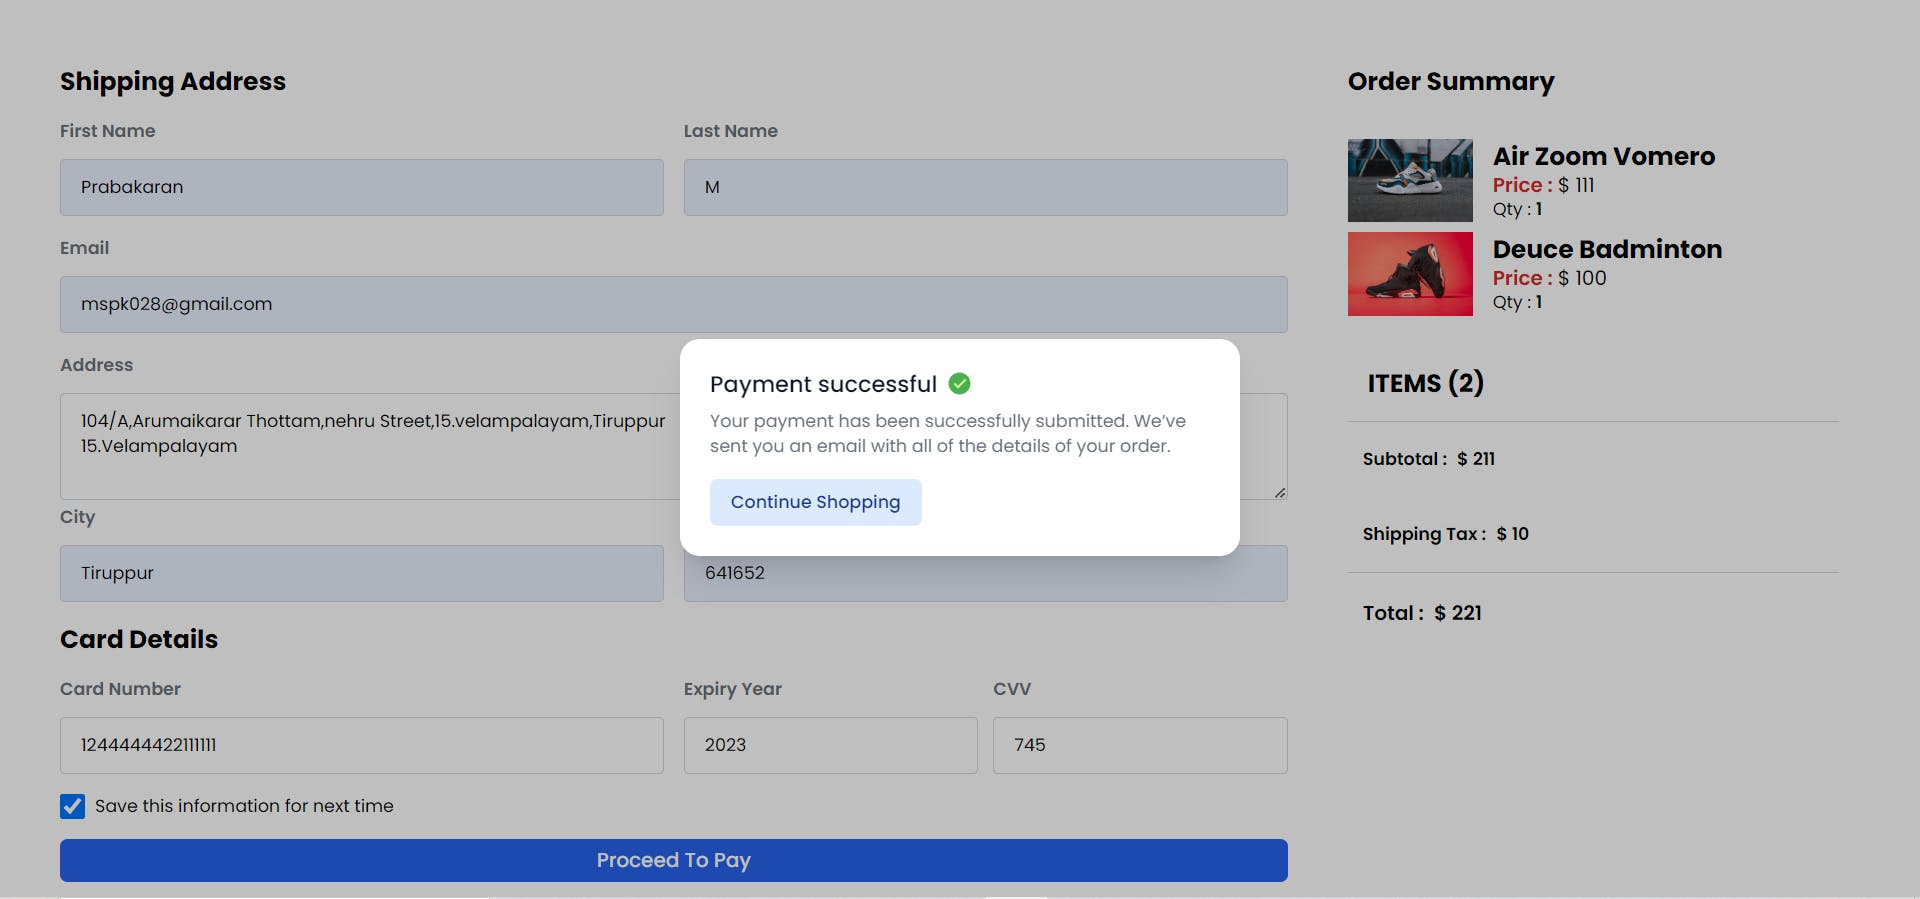
checkout page, The cart items are displayed along with the product image, name, quantity, and price.Customers can also fill in their delivery address details by completing a form, including their name, address, contact details, and any special instructions.
The next step is to enter the payment details on the card details page, where customers can securely enter their card information, including the card number, expiry date, and CVV.
Once the payment is completed, the order is processed and a confirmation page is displayed with the order details and delivery information.
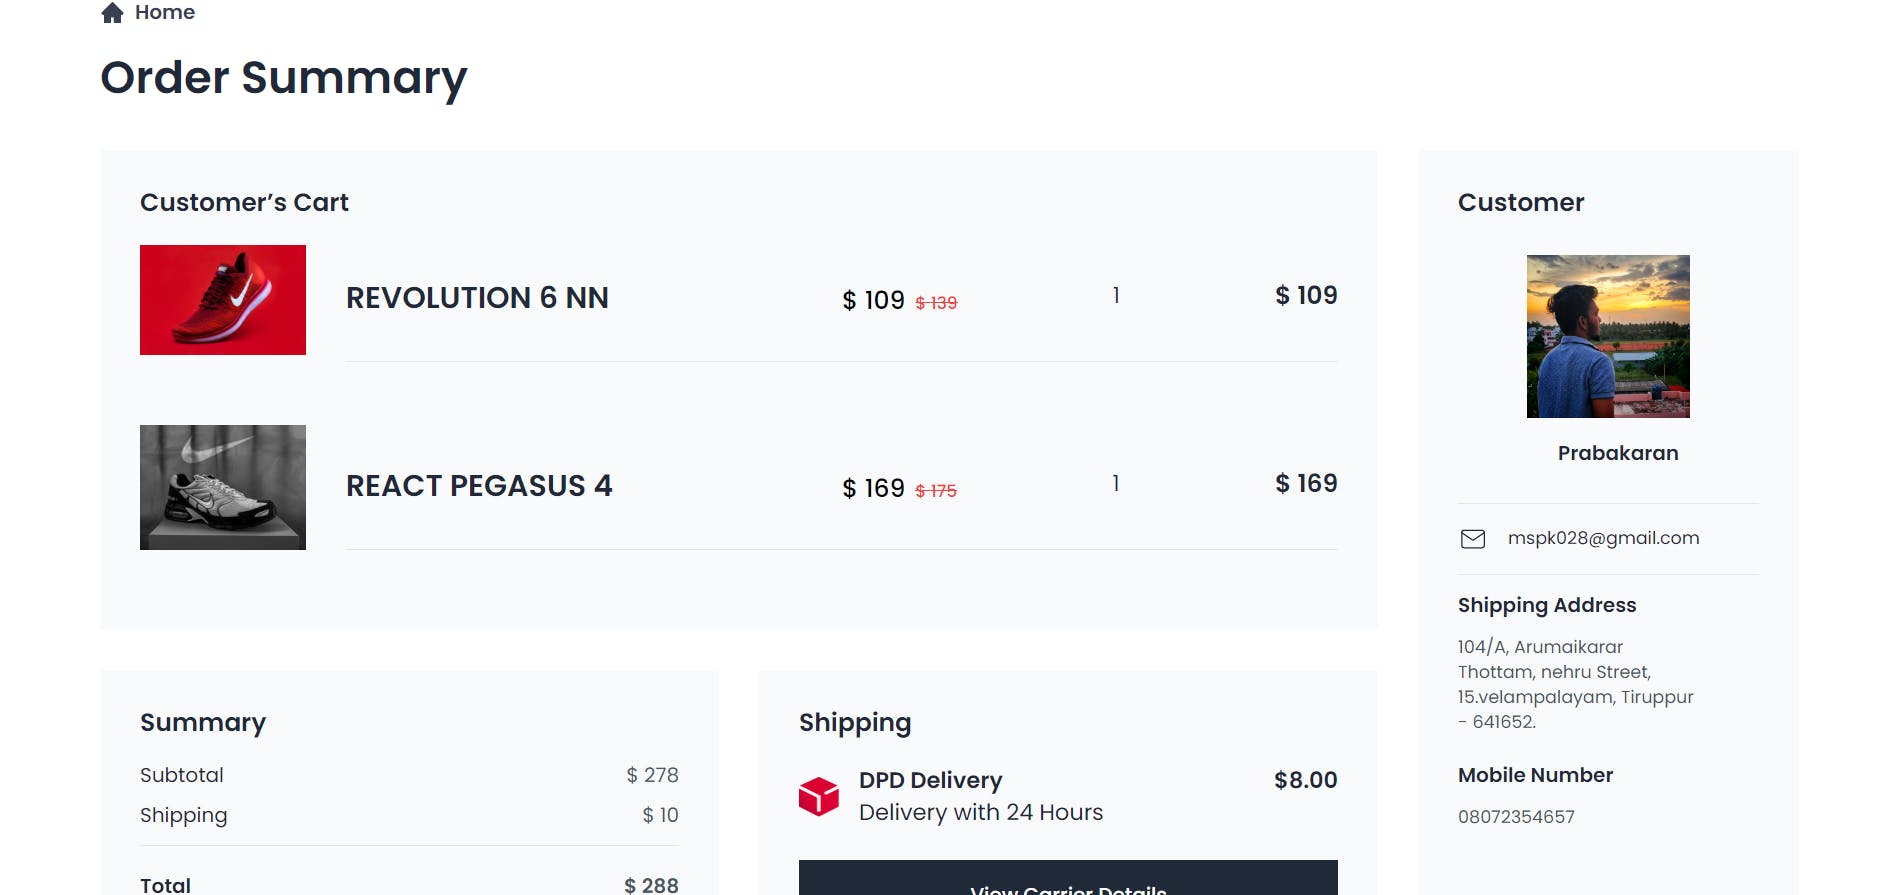
5. Order History Page
- In the order history page, the user can view various details related to their order. This includes information such as the product image, price, and quantity of each item that was ordered. Additionally, the page may also display the user's personal information, such as their name, shipping address, and number information. Overall, the order history page provides a convenient way for users to track their past purchases and review important details about their orders.
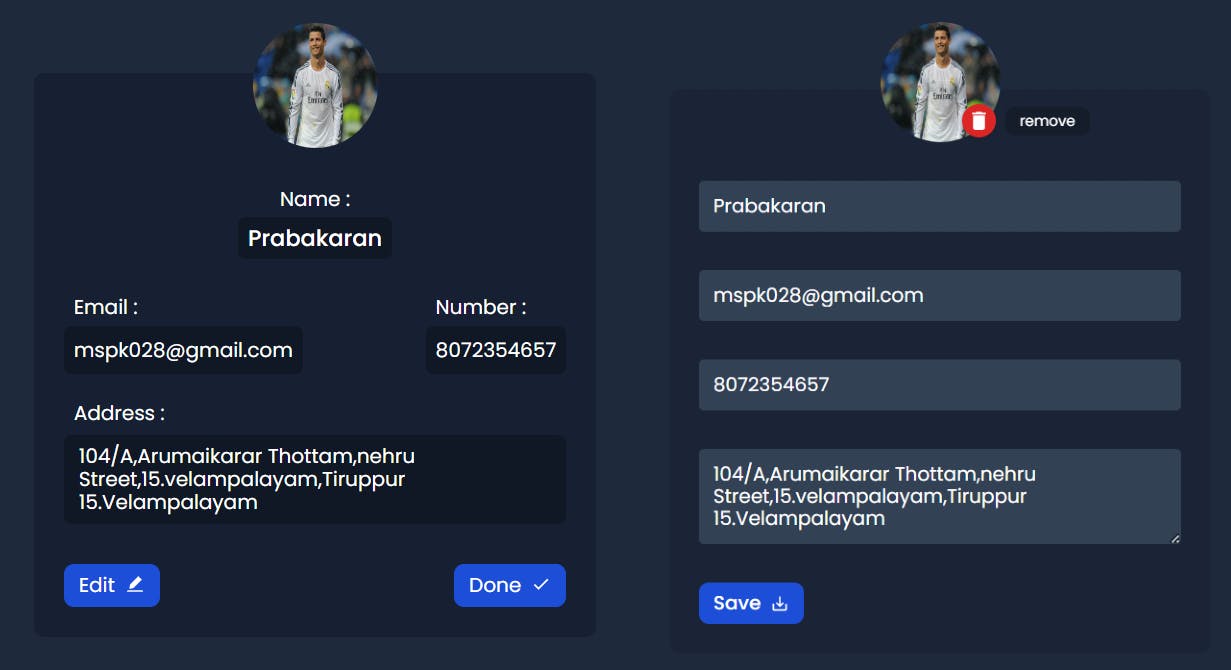
6. User Info & Add Profile Page
Our user info page displays the customer's profile information, including their name, contact details, and other relevant information. If the customer has not yet created a profile, they can do so by
navigatingto the 'Add Profile' page.On the 'Add Profile' page, customers can create a new profile by filling out a form with their personal details, including their name, email address, phone number, and other relevant information. Once the form is completed, the customer's profile is stored in
Firebaseand can be viewed on the user info page.The user info page retrieves the customer's profile information from Firebase based on their email ID. This ensures that the correct profile is displayed for each customer.
Customers can also edit their profile information by clicking on the 'Edit' button on the user info page. Any changes made to the profile information are automatically updated in Firebase, ensuring that the customer's details are always up to date.

Hooks
1.UseState
Managing state in a React project can be challenging, but we used the useState hook effectively to keep track of cart items and display them in the cart icon.
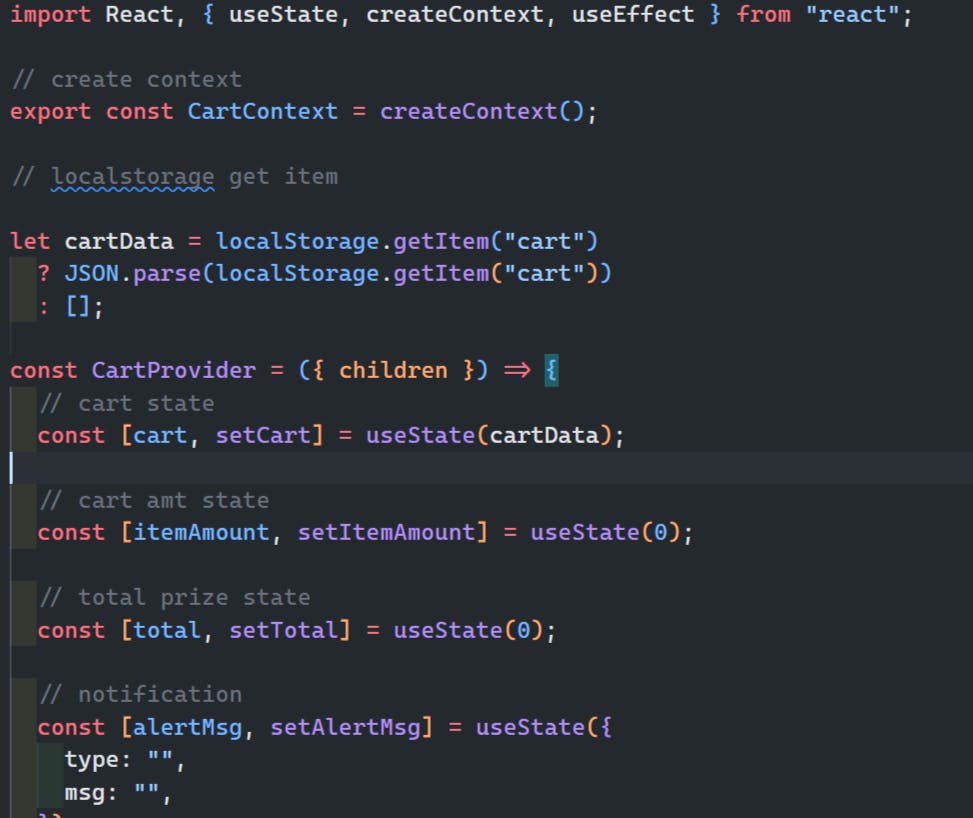
2.UseContext
I've made great use of React's Context API in my e-commerce project.
In particular, I've used three different contexts: a sidebar context, a cart item context,and a auth context.

The
sidebar contextis responsible for managing the state of the sidebar component in my application. This context stores whether the sidebar is currentlyopenorclosed, and provides functions for opening and closing the sidebar as needed.I added an
auth contextfor Firebase authentication. This allows me to manage the authentication state globally across the entire app, so I don't have to pass props down manually. It makes my code cleaner and more efficient.Finally, the
cart item contextis responsible for managing all of the items that are added to theuser's cart. This context stores information about each item, including the product name, quantity, and price. By using the cart item context, I'm able to easily keep track of which items are in the user's cart, and calculate the total cost of their purchase.
By using these three contexts, I've created a powerful and flexible data management system that makes it easy to create a rich and engaging e-commerce experience for my users.
3.useEffect

The useEffect hook was used to save cart items in local storage and calculate totals when items were added or removed from the cart. This functionality made it easier for users to keep track of their purchases, which is really important for an e-commerce project.
I also added alert notifications to inform users when cart items were added, deleted, or cleared. This made the user experience more interactive and helped users keep track of their purchases.